Zephyrとは、Linux Foundationのプロジェクトの一つでもあり、RTOS(Real Time Operating System)の一つだ。
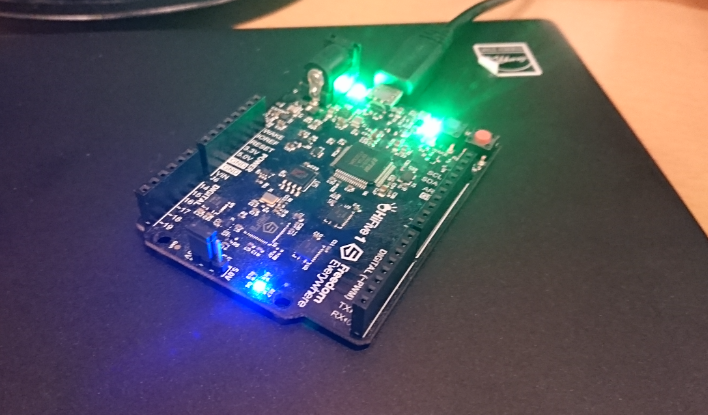
次は、SiFive社から販売されている32bit RISC-VボードHiFive1を使ってリアルタイムOSであるZephyrを動かしてみる。

参考にするのは、RISC-VのGetting Started GuideのZephyrの章(https://risc-v-getting-started-guide.readthedocs.io/en/latest/zephyr-hifive1.html#flashing)だ。 こちらの章に従って進めていくと、HiFive1ボードの上でZephyr OSを動作させ、アプリケーションを動かすことができる。
GDBとOpenOCDのダウンロード
まずは、HiFive1ボードへのZephyrのアップロードとデバッグに必要なGDB, OpenOCDをダウンロードする。ここでは、すべての作業を${HOME}/riscv/zephyr/ディレクトリ上で行う。
まずは、以下のように入力し、GDBとOpenOCDをダウンロードする。
curl -L https://static.dev.sifive.com/dev-tools/riscv64-unknown-elf-gcc-2018.07.0-x86_64-linux-ubuntu14.tar.gz | tar xz
curl -L https://static.dev.sifive.com/dev-tools/riscv-openocd-2018.7.0-x86_64-linux-ubuntu14.tar.gz | tar xz
これらの環境を、Freedom-E-SDKの上に配置しなければならない。 Freedom-E-SDKは、SiFive社が配布しているRISC-Vボードやデザインを開発するためのSDKで、HiFive1のサンプルプログラムや、フラッシュへのデータをアップロードする環境なども一通り揃っている。
git clone https://github.com/sifive/freedom-e-sdk
mkdir freedom-e-sdk/riscv-gnu-toolchain
mkdir freedom-e-sdk/openocd
mv riscv64-unknown-elf-gcc-2018.07.0-x86_64-linux-ubuntu14/* freedom-e-sdk/riscv-gnu-toolchain
mv riscv-openocd-2018.7.0-x86_64-linux-ubuntu14/* freedom-e-sdk/openocd
余談だがZephyrのビルドに使用するDevice-Tree-Compilerも最新のものを導入してかなければならない。
私の実験環境であるUbuntu 18.04でインストールされているdtcはバージョンが古くビルド時にエラーとなったので、dtcの最新バージョンをインストールしておく。
curl -L https://git.kernel.org/pub/scm/utils/dtc/dtc.git/snapshot/dtc-1.5.0.tar.gz | tar xz
cd dtc-1.5.0
make
sudo make install PREFIX=/usr/
サンプルプログラムのコンパイル
ここまでで、Zephyrの環境構築は完了した。
次に、サンプルプログラムのコンパイルを行う。
サンプルプログラムは、${ZEPHYR_BASE}/samples/hello_worldを使用する。
samples/hello_world/src/main.c
/*
 * Copyright (c) 2012-2014 Wind River Systems, Inc.
 *
 * SPDX-License-Identifier: Apache-2.0
 */

#include <zephyr.h>
#include <misc/printk.h>

void main(void)
{
        printk("Hello World! %s\n", CONFIG_BOARD);
}
たったこれだけだが、うまく実行できるとシリアルコンソール上にprintfkの結果が表示されるはずだ。
まずは作業環境を整える。
mkdir build-example
cd build-example
cmake -DBOARD=hifive1 $ZEPHYR_BASE/samples/hello_world
make -j $(nproc)
cd ..
cmake -DBOARD=hifive1 $ZEPHYR_BASE/samples/hello_worldの実行結果
Zephyr version: 1.14.0
-- Selected BOARD hifive1
-- Loading /home/msyksphinz/work/riscv/zephyr/boards/riscv32/hifive1/hifive1.dts as base
-- Overlaying /home/msyksphinz/work/riscv/zephyr/dts/common/common.dts
Parsing Kconfig tree in /home/msyksphinz/work/riscv/zephyr/Kconfig
Loading /home/msyksphinz/work/riscv/zephyr/hifive1/build-example/zephyr/.config as base
Configuration written to '/home/msyksphinz/work/riscv/zephyr/hifive1/build-example/zephyr/.config'
-- Cache files will be written to: /home/msyksphinz/.cache/zephyr
-- Configuring done
-- Generating done
-- Build files have been written to: /home/msyksphinz/work/riscv/zephyr/hifive1/build-example
make -j $(nproc)の実行結果
[ 81%] Building C object zephyr/kernel/CMakeFiles/kernel.dir/atomic_c.c.obj
[ 82%] Building C object zephyr/CMakeFiles/zephyr.dir/drivers/timer/sys_clock_init.c.obj
[ 83%] Building C object zephyr/CMakeFiles/zephyr.dir/drivers/timer/riscv_machine_timer.c.obj
[ 84%] Linking C static library libkernel.a
[ 85%] Linking C static library libzephyr.a
[ 86%] Built target kernel
[ 92%] Built target zephyr
Scanning dependencies of target zephyr_prebuilt
[ 93%] Linking C executable zephyr_prebuilt.elf
Memory region         Used Size  Region Size  %age Used
             ROM:       18068 B        12 MB      0.14%
             RAM:        4272 B        16 KB     26.07%
        IDT_LIST:         553 B         2 KB     27.00%
[ 94%] Built target zephyr_prebuilt
Scanning dependencies of target linker_pass_final_script_target
[ 95%] Generating linker_pass_final.cmd
[ 95%] Built target linker_pass_final_script_target
[ 96%] Generating isr_tables.c
Scanning dependencies of target kernel_elf
[ 97%] Building C object zephyr/CMakeFiles/kernel_elf.dir/isr_tables.c.obj
[ 98%] Linking C executable zephyr.elf
Generating files from zephyr.elf for board: hifive1
[100%] Built target kernel_elf
これでZephyrとアプリケーションのコンパイルができる。HiFive1にダウンロードして実行してみよう。
サンプルプログラムをHiFive1のフラッシュメモリに書き込む
コンパイルしたプログラムをHiFive1にダウンロードするためには、先ほどのFreedom-E-SDK環境を使用する。 まずは、HiFive1のコンフィグレーションを使用してopenocdを立ち上げ、HiFive1と接続してみる。
cd freedom-e-sdk
sudo openocd/bin/openocd -f bsp/sifive-hifive1/openocd.cfg
次に別のターミナルを開き、GDBを立ち上げる。
そして、ZephyrのバイナリをHiFive1に書き込んでみよう。
GDBを立ち上げた後、下記リストの先頭が(gdb)と記述されている行のみ入力していけばよい。
./freedom-e-sdk/riscv-gnu-toolchain/bin/riscv64-unknown-elf-gdb
(gdb) set remotetimeout 240
(gdb) target extended-remote localhost:3333
Remote debugging using localhost:3333
warning: No executable has been specified and target does not support
determining executable automatically.  Try using the "file" command.
0x20401244 in ?? ()
(gdb) monitor reset halt
JTAG tap: riscv.cpu tap/device found: 0x10e31913 (mfg: 0x489 (SiFive, Inc.), part: 0x0e31, ver: 0x1)
halted at 0x20401244 due to debug interrupt
(gdb) monitor flash protect 0 64 last off
cleared protection for sectors 64 through 255 on flash bank 0
(gdb) load /home/msyksphinz/work/riscv/zephyr/hifive1/build-example/zephyr/zephyr.elf
Loading section vector, size 0x10 lma 0x20400000
Loading section exceptions, size 0x268 lma 0x20400010
Loading section text, size 0x3ac8 lma 0x20400278
Loading section sw_isr_table, size 0x200 lma 0x20403d40
Loading section devconfig, size 0x84 lma 0x20403f40
Loading section rodata, size 0x574 lma 0x20403fc4
Loading section datas, size 0xc4 lma 0x20404538
Loading section initlevel, size 0x84 lma 0x204045fc
Loading section _k_mutex_area, size 0x14 lma 0x20404680
Start address 0x20400000, load size 18068
Transfer rate: 8 KB/sec, 2007 bytes/write.
(gdb) monitor resume
halted at 0x20400004 due to step
ここまででエラーが生じなければ、Zephyrのアップロードは完了だ。 シリアルコンソールを立ち上げて動作を確認みる。
以下を入力する。
/dev/ttyUSB1の部分は、お使いの環境でHiFive1のシリアルコンソールが認識されているデバイスファイルに適宜書き換えること。
sudo picocom -b 115200 /dev/ttyUSB1
HiFive1のリセットボタンを押すと以下のように表示された。
***** Booting Zephyr OS v1.14.0-rc3-246-g10327e59c622 *****
Hello World! hifive1
HiFive1ボードで、Zephyrのサンプルアプリケーションを動作せさせることができた。