ハードウェア記述言語であるChiselのチュートリアルを試してみている。 ChiselはScalaをベースにしているDSL(ドメイン特化言語)だ。 したがって、Scalaを勉強しながら進めていく必要がある。
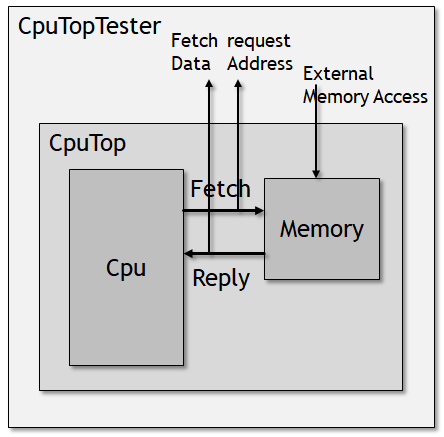
Chiselの理解のために、簡単なCPUを作ってChiselを使いシミュレーションをしてみることにした。 だいたい考えているのはおおよそこんな形だ。CPUとメモリをつなぐインタフェースを持っており、CPUが命令をフェッチして実行する。

まずはCPUから命令をフェッチする部分を考えてみることにしたが、命令をフェッチするためにはメモリにあらかじめ値を書き込んでおかなければならない。
Verilogを使う場合はreadmemhなどを使えば一発なのだが、そうもいかないのでいろいろと調査して、結局テストベンチの外からデータを流し込むことにした。
とりあえずメモリに外部との接続ポートを設けて(本当はCPUのバスと共有すべきなんだけど)、そこからデータを流し込むことにした。 以下のようなChiselのテストパタンを記述した。
src/test/scala/cpu/CpuTests.scala
  var mem_init = Array (
    0x041b0010,
    0x141301f4,
    0x2573f140,
    0x05970000,
    0x85930745,
...
    0x00000000,
    0x00000000
  )
...
  for (addr <- 0 to mem_init.length-1) {
    poke (cpu_tb.io.i_memReq, 1)
    poke (cpu_tb.io.i_memAddr, addr)
    poke (cpu_tb.io.i_memData, mem_init(addr) & 0x0000FFFFFFFFL)

    step(1)
  }
最後のpokeを使って、外部からメモリへとデータを書き込んでいる。
ちなみに、mem_init(addr) & 0x0000FFFFFFFFLという「そんなのいらんやろ」みたいな記述は、Scalaは符号なし型が存在しない?という制約から、無理やり符号拡張を防ぐための処理だ。
これがないとChiselでコンパイルエラーになる。
メモリに値を書き込んだら、外部ピンをAssertしてCPUのフェッチを開始する。
src/test/scala/cpu/CpuTests.scala
  step(1)
  step(1)
  poke (cpu_tb.io.i_run, 1)
  step(1)
するとフェッチが始まるので、とりあえずその値をキャプチャする。とりあえずまっすぐフェッチしていくだけなので、フェッチアドレスはサイクル毎に+4で上がっていくはずだ。
  for (step_idx <- 0 to 10 by 1) {
    val hexwidth = 8

    expect(cpu_tb.io.o_DebugInstReq,  1)
    expect(cpu_tb.io.o_DebugInstAddr, step_idx * 4)

    printf(s"<Info: Step %02d Instruction %0${hexwidth}x is fetched>\n", step_idx, peek(cpu_tb.io.o_DebugInstData))

    step(1)
  }
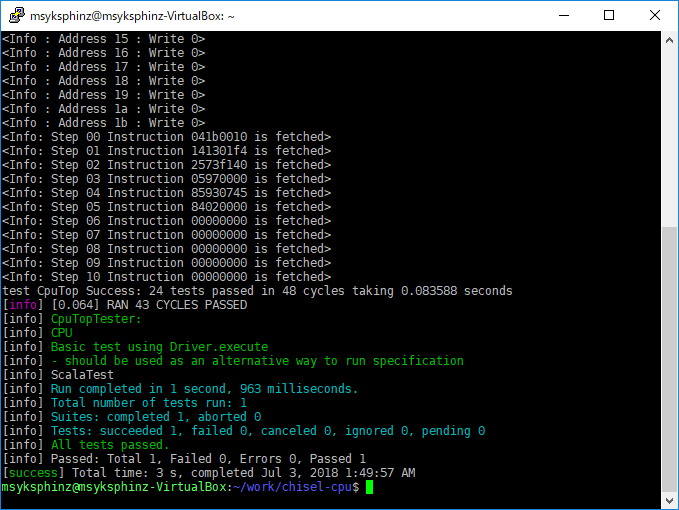
(まあここまで来るのに何回もエラーだらけでやり直したんだけど、)実行した結果、以下のようになった。
$ sbt 'testOnly cpu.CpuTopTester -- -z Basic'
...
[info] [0.001] SEED 1530550195363
<Info : Address 0 : Write 41b0010>
<Info : Address 1 : Write 141301f4>
<Info : Address 2 : Write 2573f140>
<Info : Address 3 : Write 5970000>
<Info : Address 4 : Write 85930745>
<Info : Address 5 : Write 84020000>
<Info : Address 6 : Write 0>
<Info : Address 7 : Write 0>
<Info : Address 8 : Write 0>
<Info : Address 9 : Write 0>
<Info : Address a : Write 0>
<Info : Address b : Write 0>
<Info : Address c : Write 0>
<Info : Address d : Write 0>
<Info : Address e : Write 0>
<Info : Address f : Write 0>
<Info : Address 10 : Write 2573f140>
<Info : Address 11 : Write 5970000>
<Info : Address 12 : Write 859303c5>
<Info : Address 13 : Write 731050>
<Info : Address 14 : Write bff50000>
<Info : Address 15 : Write 0>
<Info : Address 16 : Write 0>
<Info : Address 17 : Write 0>
<Info : Address 18 : Write 0>
<Info : Address 19 : Write 0>
<Info : Address 1a : Write 0>
<Info : Address 1b : Write 0>
<Info: Step 00 Instruction 041b0010 is fetched>
<Info: Step 01 Instruction 141301f4 is fetched>
<Info: Step 02 Instruction 2573f140 is fetched>
<Info: Step 03 Instruction 05970000 is fetched>
<Info: Step 04 Instruction 85930745 is fetched>
<Info: Step 05 Instruction 84020000 is fetched>
<Info: Step 06 Instruction 00000000 is fetched>
<Info: Step 07 Instruction 00000000 is fetched>
<Info: Step 08 Instruction 00000000 is fetched>
<Info: Step 09 Instruction 00000000 is fetched>
<Info: Step 10 Instruction 00000000 is fetched>
test CpuTop Success: 24 tests passed in 48 cycles taking 0.083588 seconds
[info] [0.064] RAN 43 CYCLES PASSED
[info] CpuTopTester:
[info] CPU
[info] Basic test using Driver.execute
[info] - should be used as an alternative way to run specification
[info] ScalaTest
[info] Run completed in 1 second, 963 milliseconds.
[info] Total number of tests run: 1
[info] Suites: completed 1, aborted 0
[info] Tests: succeeded 1, failed 0, canceled 0, ignored 0, pending 0
[info] All tests passed.
[info] Passed: Total 1, Failed 0, Errors 0, Passed 1
[success] Total time: 3 s, completed Jul 3, 2018 1:49:57 AM
アドレスが順調に伸びていって、期待通りのフェッチができていることが分かる。とりあえず成功だ。

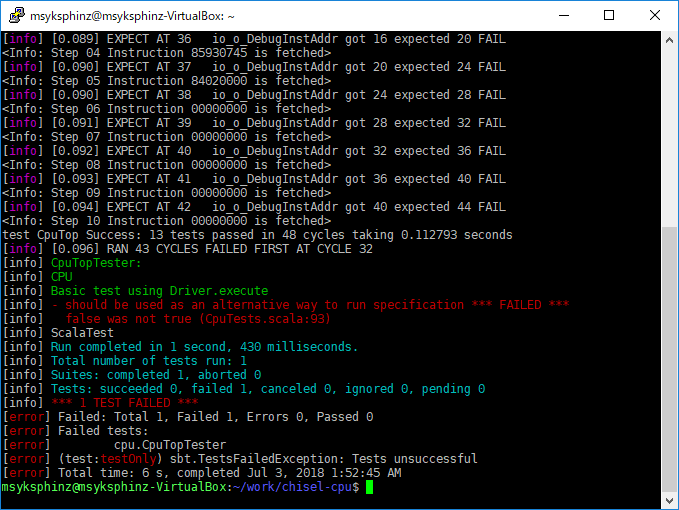
ちなみに失敗すると以下のようになる。デバッグきつい。

こうしてデバッグしていて気がついたのは、外部のテストベンチからテストするとき、デバッグピンは必ず外に出さないといけないらしい?
つまり、今回は内部のCPUのフェッチピントフェッチアドレスを見たわけだけど、これをテストするためにはわざわざDUTの外に波形を持ってこなければならないのかもしれない。 これは面倒くさい。。。
src/main/scala/cpu/cpu.scala
class CpuTop extends Module {
  val io = IO (new Bundle {
    val i_run     = Input(Bool())
...  // アサーションを打ちたいときは、必ず外にピンを出してこなければならない?
    val o_DebugInstReq  = Output(Bool())
    val o_DebugInstAddr = Output(UInt(8.W))
    val o_DebugInstData = Output(UInt(32.W))
  })
...

- `src/test/scala/cpu/CpuTests.scala`
// 参照するときも必ずテストベンチの外部ポートに出してく必要がある? expect(cpu_tb.io.o_DebugInstReq, 1) expect(cpu_tb.io.o_DebugInstAddr, 0)